Creating a Sentiment Analysis Web App by using PyTorch and SageMaker
Creating a Sentiment Analysis Web App
Using PyTorch and SageMaker
Deep Learning Nanodegree Program | Deployment
s
Now that we have a basic understanding of how SageMaker works we will try to use it to construct a complete project from end to end. Our goal will be to have a simple web page which a user can use to enter a movie review. The web page will then send the review off to our deployed model which will predict the sentiment of the entered review.
Instructions
Some template code has already been provided for you, and you will need to implement additional functionality to successfully complete this notebook. You will not need to modify the included code beyond what is requested. Sections that begin with ‘TODO‘ in the header indicate that you need to complete or implement some portion within them. Instructions will be provided for each section and the specifics of the implementation are marked in the code block with a # TODO: ... comment. Please be sure to read the instructions carefully!
In addition to implementing code, there will be questions for you to answer which relate to the task and your implementation. Each section where you will answer a question is preceded by a ‘Question:‘ header. Carefully read each question and provide your answer below the ‘Answer:‘ header by editing the Markdown cell.
Note: Code and Markdown cells can be executed using the Shift+Enter keyboard shortcut. In addition, a cell can be edited by typically clicking it (double-click for Markdown cells) or by pressing Enter while it is highlighted.
General Outline
Recall the general outline for SageMaker projects using a notebook instance.
- Download or otherwise retrieve the data.
- Process / Prepare the data.
- Upload the processed data to S3.
- Train a chosen model.
- Test the trained model (typically using a batch transform job).
- Deploy the trained model.
- Use the deployed model.
For this project, you will be following the steps in the general outline with some modifications.
First, you will not be testing the model in its own step. You will still be testing the model, however, you will do it by deploying your model and then using the deployed model by sending the test data to it. One of the reasons for doing this is so that you can make sure that your deployed model is working correctly before moving forward.
In addition, you will deploy and use your trained model a second time. In the second iteration you will customize the way that your trained model is deployed by including some of your own code. In addition, your newly deployed model will be used in the sentiment analysis web app.
Step 1: Downloading the data
As in the XGBoost in SageMaker notebook, we will be using the IMDb dataset
Maas, Andrew L., et al. Learning Word Vectors for Sentiment Analysis. In Proceedings of the 49th Annual Meeting of the Association for Computational Linguistics: Human Language Technologies. Association for Computational Linguistics, 2011.
1 | %mkdir ../data |
mkdir: cannot create directory ‘../data’: File exists
--2020-02-23 10:05:42--  http://ai.stanford.edu/~amaas/data/sentiment/aclImdb_v1.tar.gz
Resolving ai.stanford.edu (ai.stanford.edu)... 171.64.68.10
Connecting to ai.stanford.edu (ai.stanford.edu)|171.64.68.10|:80... connected.
HTTP request sent, awaiting response... 200 OK
Length: 84125825 (80M) [application/x-gzip]
Saving to: ‘../data/aclImdb_v1.tar.gz’

../data/aclImdb_v1. 100%[===================>]  80.23M  21.9MB/s    in 4.5s

2020-02-23 10:05:47 (17.7 MB/s) - ‘../data/aclImdb_v1.tar.gz’ saved [84125825/84125825]
Step 2: Preparing and Processing the data
Also, as in the XGBoost notebook, we will be doing some initial data processing. The first few steps are the same as in the XGBoost example. To begin with, we will read in each of the reviews and combine them into a single input structure. Then, we will split the dataset into a training set and a testing set.
1 | import os |
1 | data, labels = read_imdb_data() |
IMDB reviews: train = 12500 pos / 12500 neg, test = 12500 pos / 12500 negNow that we’ve read the raw training and testing data from the downloaded dataset, we will combine the positive and negative reviews and shuffle the resulting records.
1 | from sklearn.utils import shuffle |
1 | train_X, test_X, train_y, test_y = prepare_imdb_data(data, labels) |
IMDb reviews (combined): train = 25000, test = 25000Now that we have our training and testing sets unified and prepared, we should do a quick check and see an example of the data our model will be trained on. This is generally a good idea as it allows you to see how each of the further processing steps affects the reviews and it also ensures that the data has been loaded correctly.
1 | print(train_X[100]) |
Every new fall line-up show deserves, at least, my "3 strikes and you're out" policy. I give a comedy 3 chances to make me laugh, that is, 3 complete episodes. After Episode 1, I actually said to the TV,"Cancelled tomorrow". It was that bad. I have now watched the first 4 episodes of "Cavemen" and have yet to manage even a smirk. Not a titter, a guffaw, a chortle, as a matter of fact, no facial movement at all. I will continue to punish myself by watching every future episode because I am convinced that I am clearly missing something in this show. I'm simply not "getting" it, but I believe that a comedy on a major TV network in prime-time, just HAS to be funny; but there are no laughs from me YET. There's just no way that ABC would put on the least funniest comedy of all time at 8:00 p.m. I KNOW there has got to be an inside joke that just isn't jiving with my brain. I've read each of the previous comments, I "get" the social aspect of it, but, WHERE ARE THE JOKES ???? I shall continue suffering for at least 30 minutes a week, until I have a light-bulb moment and smack myself in the head shouting "Eureka".
0
The first step in processing the reviews is to make sure that any html tags that appear should be removed. In addition we wish to tokenize our input, that way words such as entertained and entertaining are considered the same with regard to sentiment analysis.
1 | import nltk |
The review_to_words method defined above uses BeautifulSoup to remove any html tags that appear and uses the nltk package to tokenize the reviews. As a check to ensure we know how everything is working, try applying review_to_words to one of the reviews in the training set.
1 | # TODO: Apply review_to_words to a review (train_X[100] or any other review) |
['everi', 'new', 'fall', 'line', 'show', 'deserv', 'least', '3', 'strike', 'polici', 'give', 'comedi', '3', 'chanc', 'make', 'laugh', '3', 'complet', 'episod', 'episod', '1', 'actual', 'said', 'tv', 'cancel', 'tomorrow', 'bad', 'watch', 'first', '4', 'episod', 'cavemen', 'yet', 'manag', 'even', 'smirk', 'titter', 'guffaw', 'chortl', 'matter', 'fact', 'facial', 'movement', 'continu', 'punish', 'watch', 'everi', 'futur', 'episod', 'convinc', 'clearli', 'miss', 'someth', 'show', 'simpli', 'get', 'believ', 'comedi', 'major', 'tv', 'network', 'prime', 'time', 'funni', 'laugh', 'yet', 'way', 'abc', 'would', 'put', 'least', 'funniest', 'comedi', 'time', '8', '00', 'p', 'know', 'got', 'insid', 'joke', 'jive', 'brain', 'read', 'previou', 'comment', 'get', 'social', 'aspect', 'joke', 'shall', 'continu', 'suffer', 'least', '30', 'minut', 'week', 'light', 'bulb', 'moment', 'smack', 'head', 'shout', 'eureka']Question: Above we mentioned that review_to_words method removes html formatting and allows us to tokenize the words found in a review, for example, converting entertained and entertaining into entertain so that they are treated as though they are the same word. What else, if anything, does this method do to the input?
Answer: This method convert all upper case to lower case and all punctuations are removed.
The method below applies the review_to_words method to each of the reviews in the training and testing datasets. In addition it caches the results. This is because performing this processing step can take a long time. This way if you are unable to complete the notebook in the current session, you can come back without needing to process the data a second time.
1 | import pickle |
1 | # Preprocess data |
Read preprocessed data from cache file: preprocessed_data.pklTransform the data
In the XGBoost notebook we transformed the data from its word representation to a bag-of-words feature representation. For the model we are going to construct in this notebook we will construct a feature representation which is very similar. To start, we will represent each word as an integer. Of course, some of the words that appear in the reviews occur very infrequently and so likely don’t contain much information for the purposes of sentiment analysis. The way we will deal with this problem is that we will fix the size of our working vocabulary and we will only include the words that appear most frequently. We will then combine all of the infrequent words into a single category and, in our case, we will label it as 1.
Since we will be using a recurrent neural network, it will be convenient if the length of each review is the same. To do this, we will fix a size for our reviews and then pad short reviews with the category ‘no word’ (which we will label 0) and truncate long reviews.
(TODO) Create a word dictionary
To begin with, we need to construct a way to map words that appear in the reviews to integers. Here we fix the size of our vocabulary (including the ‘no word’ and ‘infrequent’ categories) to be 5000 but you may wish to change this to see how it affects the model.
TODO: Complete the implementation for the
build_dict()method below. Note that even though the vocab_size is set to5000, we only want to construct a mapping for the most frequently appearing4998words. This is because we want to reserve the special labels0for ‘no word’ and1for ‘infrequent word’.
1 | import numpy as np |
1 | word_dict = build_dict(train_X) |
Question: What are the five most frequently appearing (tokenized) words in the training set? Does it makes sense that these words appear frequently in the training set?
Answer:
1 | print([i for i in word_dict.keys()][:5]) |
['movi', 'film', 'one', 'like', 'time']This makes sense since those words are common in movie reviews
Save word_dict
Later on when we construct an endpoint which processes a submitted review we will need to make use of the word_dict which we have created. As such, we will save it to a file now for future use.
1 | data_dir = '../data/pytorch' # The folder we will use for storing data |
1 | with open(os.path.join(data_dir, 'word_dict.pkl'), "wb") as f: |
Transform the reviews
Now that we have our word dictionary which allows us to transform the words appearing in the reviews into integers, it is time to make use of it and convert our reviews to their integer sequence representation, making sure to pad or truncate to a fixed length, which in our case is 500.
1 | def convert_and_pad(word_dict, sentence, pad=500): |
1 | train_X, train_X_len = convert_and_pad_data(word_dict, train_X) |
As a quick check to make sure that things are working as intended, check to see what one of the reviews in the training set looks like after having been processeed. Does this look reasonable? What is the length of a review in the training set?
1 | # Use this cell to examine one of the processed reviews to make sure everything is working as intended. |
The processed review is:
[ 135    3   28   31  272 1280    1    1  669 1663    1 3417    3   94
   96  813  147    3   23    8   59   30 1477    1    4    1   43  110
  709    3   33 2437  230 4095  358    1   50  575    1   55   75 3439
    1 1770   43  260   43   68    1  331   94 1549  419   42  601  283
 1477   50  255 1310    1   55  420   50   40   33   75   29   50   22
  147  580   74   59   30    4  395    2  119  324 1053  232    0    0
    0    0    0    0    0    0    0    0    0    0    0    0    0    0
    0    0    0    0    0    0    0    0    0    0    0    0    0    0
    0    0    0    0    0    0    0    0    0    0    0    0    0    0
    0    0    0    0    0    0    0    0    0    0    0    0    0    0
    0    0    0    0    0    0    0    0    0    0    0    0    0    0
    0    0    0    0    0    0    0    0    0    0    0    0    0    0
    0    0    0    0    0    0    0    0    0    0    0    0    0    0
    0    0    0    0    0    0    0    0    0    0    0    0    0    0
    0    0    0    0    0    0    0    0    0    0    0    0    0    0
    0    0    0    0    0    0    0    0    0    0    0    0    0    0
    0    0    0    0    0    0    0    0    0    0    0    0    0    0
    0    0    0    0    0    0    0    0    0    0    0    0    0    0
    0    0    0    0    0    0    0    0    0    0    0    0    0    0
    0    0    0    0    0    0    0    0    0    0    0    0    0    0
    0    0    0    0    0    0    0    0    0    0    0    0    0    0
    0    0    0    0    0    0    0    0    0    0    0    0    0    0
    0    0    0    0    0    0    0    0    0    0    0    0    0    0
    0    0    0    0    0    0    0    0    0    0    0    0    0    0
    0    0    0    0    0    0    0    0    0    0    0    0    0    0
    0    0    0    0    0    0    0    0    0    0    0    0    0    0
    0    0    0    0    0    0    0    0    0    0    0    0    0    0
    0    0    0    0    0    0    0    0    0    0    0    0    0    0
    0    0    0    0    0    0    0    0    0    0    0    0    0    0
    0    0    0    0    0    0    0    0    0    0    0    0    0    0
    0    0    0    0    0    0    0    0    0    0    0    0    0    0
    0    0    0    0    0    0    0    0    0    0    0    0    0    0
    0    0    0    0    0    0    0    0    0    0    0    0    0    0
    0    0    0    0    0    0    0    0    0    0    0    0    0    0
    0    0    0    0    0    0    0    0    0    0    0    0    0    0
    0    0    0    0    0    0    0    0    0    0].
The length of the review is:
82.
It looks reasonable, and the length of the review is 82.
Question: In the cells above we use the preprocess_data and convert_and_pad_data methods to process both the training and testing set. Why or why not might this be a problem?
Answer: It might not be a problem for training the model since all reviews are converted into the same length. However, it might require more memory since shorter reviews are converted into longer format.
Step 3: Upload the data to S3
As in the XGBoost notebook, we will need to upload the training dataset to S3 in order for our training code to access it. For now we will save it locally and we will upload to S3 later on.
Save the processed training dataset locally
It is important to note the format of the data that we are saving as we will need to know it when we write the training code. In our case, each row of the dataset has the form label, length, review[500] where review[500] is a sequence of 500 integers representing the words in the review.
1 | import pandas as pd |
Uploading the training data
Next, we need to upload the training data to the SageMaker default S3 bucket so that we can provide access to it while training our model.
1 | import sagemaker |
1 | input_data = sagemaker_session.upload_data(path=data_dir, bucket=bucket, key_prefix=prefix) |
NOTE: The cell above uploads the entire contents of our data directory. This includes the word_dict.pkl file. This is fortunate as we will need this later on when we create an endpoint that accepts an arbitrary review. For now, we will just take note of the fact that it resides in the data directory (and so also in the S3 training bucket) and that we will need to make sure it gets saved in the model directory.
Step 4: Build and Train the PyTorch Model
In the XGBoost notebook we discussed what a model is in the SageMaker framework. In particular, a model comprises three objects
- Model Artifacts,
- Training Code, and
- Inference Code,
each of which interact with one another. In the XGBoost example we used training and inference code that was provided by Amazon. Here we will still be using containers provided by Amazon with the added benefit of being able to include our own custom code.
We will start by implementing our own neural network in PyTorch along with a training script. For the purposes of this project we have provided the necessary model object in the model.py file, inside of the train folder. You can see the provided implementation by running the cell below.
1 | !pygmentize train/model.py |
[34mimport[39;49;00m [04m[36mtorch.nn[39;49;00m [34mas[39;49;00m [04m[36mnn[39;49;00m
[34mclass[39;49;00m [04m[32mLSTMClassifier[39;49;00m(nn.Module):
[33m"""[39;49;00m
[33m This is the simple RNN model we will be using to perform Sentiment Analysis.[39;49;00m
[33m """[39;49;00m
[34mdef[39;49;00m [32m__init__[39;49;00m([36mself[39;49;00m, embedding_dim, hidden_dim, vocab_size):
[33m"""[39;49;00m
[33m Initialize the model by settingg up the various layers.[39;49;00m
[33m """[39;49;00m
[36msuper[39;49;00m(LSTMClassifier, [36mself[39;49;00m).[32m__init__[39;49;00m()
[36mself[39;49;00m.embedding = nn.Embedding(vocab_size, embedding_dim, padding_idx=[34m0[39;49;00m)
[36mself[39;49;00m.lstm = nn.LSTM(embedding_dim, hidden_dim)
[36mself[39;49;00m.dense = nn.Linear(in_features=hidden_dim, out_features=[34m1[39;49;00m)
[36mself[39;49;00m.sig = nn.Sigmoid()
[36mself[39;49;00m.word_dict = [36mNone[39;49;00m
[34mdef[39;49;00m [32mforward[39;49;00m([36mself[39;49;00m, x):
[33m"""[39;49;00m
[33m Perform a forward pass of our model on some input.[39;49;00m
[33m """[39;49;00m
x = x.t()
lengths = x[[34m0[39;49;00m,:]
reviews = x[[34m1[39;49;00m:,:]
embeds = [36mself[39;49;00m.embedding(reviews)
lstm_out, _ = [36mself[39;49;00m.lstm(embeds)
out = [36mself[39;49;00m.dense(lstm_out)
out = out[lengths - [34m1[39;49;00m, [36mrange[39;49;00m([36mlen[39;49;00m(lengths))]
[34mreturn[39;49;00m [36mself[39;49;00m.sig(out.squeeze())The important takeaway from the implementation provided is that there are three parameters that we may wish to tweak to improve the performance of our model. These are the embedding dimension, the hidden dimension and the size of the vocabulary. We will likely want to make these parameters configurable in the training script so that if we wish to modify them we do not need to modify the script itself. We will see how to do this later on. To start we will write some of the training code in the notebook so that we can more easily diagnose any issues that arise.
First we will load a small portion of the training data set to use as a sample. It would be very time consuming to try and train the model completely in the notebook as we do not have access to a gpu and the compute instance that we are using is not particularly powerful. However, we can work on a small bit of the data to get a feel for how our training script is behaving.
1 | import torch |
(TODO) Writing the training method
Next we need to write the training code itself. This should be very similar to training methods that you have written before to train PyTorch models. We will leave any difficult aspects such as model saving / loading and parameter loading until a little later.
1 | def train(model, train_loader, epochs, optimizer, loss_fn, device): |
Supposing we have the training method above, we will test that it is working by writing a bit of code in the notebook that executes our training method on the small sample training set that we loaded earlier. The reason for doing this in the notebook is so that we have an opportunity to fix any errors that arise early when they are easier to diagnose.
1 | import torch.optim as optim |
Epoch: 1, BCELoss: 0.6931784152984619
Epoch: 2, BCELoss: 0.683626139163971
Epoch: 3, BCELoss: 0.6755886435508728
Epoch: 4, BCELoss: 0.6667218565940857
Epoch: 5, BCELoss: 0.6559338450431824
In order to construct a PyTorch model using SageMaker we must provide SageMaker with a training script. We may optionally include a directory which will be copied to the container and from which our training code will be run. When the training container is executed it will check the uploaded directory (if there is one) for a requirements.txt file and install any required Python libraries, after which the training script will be run.
(TODO) Training the model
When a PyTorch model is constructed in SageMaker, an entry point must be specified. This is the Python file which will be executed when the model is trained. Inside of the train directory is a file called train.py which has been provided and which contains most of the necessary code to train our model. The only thing that is missing is the implementation of the train() method which you wrote earlier in this notebook.
TODO: Copy the train() method written above and paste it into the train/train.py file where required.
The way that SageMaker passes hyperparameters to the training script is by way of arguments. These arguments can then be parsed and used in the training script. To see how this is done take a look at the provided train/train.py file.
1 | from sagemaker.pytorch import PyTorch |
1 | estimator.fit({'training': input_data}) |
2020-02-23 10:29:09 Starting - Starting the training job...
2020-02-23 10:29:11 Starting - Launching requested ML instances......
2020-02-23 10:30:10 Starting - Preparing the instances for training......
2020-02-23 10:31:12 Downloading - Downloading input data...
2020-02-23 10:31:56 Training - Downloading the training image..[34mbash: cannot set terminal process group (-1): Inappropriate ioctl for device[0m
[34mbash: no job control in this shell[0m
[34m2020-02-23 10:32:19,999 sagemaker-containers INFO Imported framework sagemaker_pytorch_container.training[0m
[34m2020-02-23 10:32:20,024 sagemaker_pytorch_container.training INFO Block until all host DNS lookups succeed.[0m
2020-02-23 10:32:19 Training - Training image download completed. Training in progress.[34m2020-02-23 10:32:26,248 sagemaker_pytorch_container.training INFO Invoking user training script.[0m
[34m2020-02-23 10:32:26,469 sagemaker-containers INFO Module train does not provide a setup.py. [0m
[34mGenerating setup.py[0m
[34m2020-02-23 10:32:26,470 sagemaker-containers INFO Generating setup.cfg[0m
[34m2020-02-23 10:32:26,470 sagemaker-containers INFO Generating MANIFEST.in[0m
[34m2020-02-23 10:32:26,470 sagemaker-containers INFO Installing module with the following command:[0m
[34m/usr/bin/python -m pip install -U . -r requirements.txt[0m
[34mProcessing /opt/ml/code[0m
[34mCollecting pandas (from -r requirements.txt (line 1))[0m
[34m Downloading https://files.pythonhosted.org/packages/74/24/0cdbf8907e1e3bc5a8da03345c23cbed7044330bb8f73bb12e711a640a00/pandas-0.24.2-cp35-cp35m-manylinux1_x86_64.whl (10.0MB)[0m
[34mCollecting numpy (from -r requirements.txt (line 2))
Downloading https://files.pythonhosted.org/packages/52/e6/1715e592ef47f28f3f50065322423bb75619ed2f7c24be86380ecc93503c/numpy-1.18.1-cp35-cp35m-manylinux1_x86_64.whl (19.9MB)[0m
[34mCollecting nltk (from -r requirements.txt (line 3))
Downloading https://files.pythonhosted.org/packages/f6/1d/d925cfb4f324ede997f6d47bea4d9babba51b49e87a767c170b77005889d/nltk-3.4.5.zip (1.5MB)[0m
[34mCollecting beautifulsoup4 (from -r requirements.txt (line 4))[0m
[34m Downloading https://files.pythonhosted.org/packages/cb/a1/c698cf319e9cfed6b17376281bd0efc6bfc8465698f54170ef60a485ab5d/beautifulsoup4-4.8.2-py3-none-any.whl (106kB)[0m
[34mCollecting html5lib (from -r requirements.txt (line 5))
Downloading https://files.pythonhosted.org/packages/a5/62/bbd2be0e7943ec8504b517e62bab011b4946e1258842bc159e5dfde15b96/html5lib-1.0.1-py2.py3-none-any.whl (117kB)[0m
[34mRequirement already satisfied, skipping upgrade: python-dateutil>=2.5.0 in /usr/local/lib/python3.5/dist-packages (from pandas->-r requirements.txt (line 1)) (2.7.5)[0m
[34mCollecting pytz>=2011k (from pandas->-r requirements.txt (line 1))
Downloading https://files.pythonhosted.org/packages/e7/f9/f0b53f88060247251bf481fa6ea62cd0d25bf1b11a87888e53ce5b7c8ad2/pytz-2019.3-py2.py3-none-any.whl (509kB)[0m
[34mRequirement already satisfied, skipping upgrade: six in /usr/local/lib/python3.5/dist-packages (from nltk->-r requirements.txt (line 3)) (1.11.0)[0m
[34mCollecting soupsieve>=1.2 (from beautifulsoup4->-r requirements.txt (line 4))
Downloading https://files.pythonhosted.org/packages/05/cf/ea245e52f55823f19992447b008bcbb7f78efc5960d77f6c34b5b45b36dd/soupsieve-2.0-py2.py3-none-any.whl[0m
[34mCollecting webencodings (from html5lib->-r requirements.txt (line 5))
Downloading https://files.pythonhosted.org/packages/f4/24/2a3e3df732393fed8b3ebf2ec078f05546de641fe1b667ee316ec1dcf3b7/webencodings-0.5.1-py2.py3-none-any.whl[0m
[34mBuilding wheels for collected packages: nltk, train
Running setup.py bdist_wheel for nltk: started[0m
[34m Running setup.py bdist_wheel for nltk: finished with status 'done'
Stored in directory: /root/.cache/pip/wheels/96/86/f6/68ab24c23f207c0077381a5e3904b2815136b879538a24b483
Running setup.py bdist_wheel for train: started
Running setup.py bdist_wheel for train: finished with status 'done'
Stored in directory: /tmp/pip-ephem-wheel-cache-1z_fwhiw/wheels/35/24/16/37574d11bf9bde50616c67372a334f94fa8356bc7164af8ca3[0m
[34mSuccessfully built nltk train[0m
[34mInstalling collected packages: pytz, numpy, pandas, nltk, soupsieve, beautifulsoup4, webencodings, html5lib, train[0m
[34m Found existing installation: numpy 1.15.4
Uninstalling numpy-1.15.4:
Successfully uninstalled numpy-1.15.4[0m
[34mSuccessfully installed beautifulsoup4-4.8.2 html5lib-1.0.1 nltk-3.4.5 numpy-1.18.1 pandas-0.24.2 pytz-2019.3 soupsieve-2.0 train-1.0.0 webencodings-0.5.1[0m
[34mYou are using pip version 18.1, however version 20.0.2 is available.[0m
[34mYou should consider upgrading via the 'pip install --upgrade pip' command.[0m
[34m2020-02-23 10:32:39,087 sagemaker-containers INFO Invoking user script
[0m
[34mTraining Env:
[0m
[34m{
"channel_input_dirs": {
"training": "/opt/ml/input/data/training"
},
"current_host": "algo-1",
"module_dir": "s3://sagemaker-us-east-2-621192006701/sagemaker-pytorch-2020-02-23-10-29-09-269/source/sourcedir.tar.gz",
"user_entry_point": "train.py",
"output_intermediate_dir": "/opt/ml/output/intermediate",
"model_dir": "/opt/ml/model",
"output_data_dir": "/opt/ml/output/data",
"hyperparameters": {
"hidden_dim": 200,
"epochs": 10
},
"framework_module": "sagemaker_pytorch_container.training:main",
"resource_config": {
"network_interface_name": "eth0",
"current_host": "algo-1",
"hosts": [
"algo-1"
]
},
"num_gpus": 1,
"output_dir": "/opt/ml/output",
"num_cpus": 4,
"log_level": 20,
"network_interface_name": "eth0",
"input_config_dir": "/opt/ml/input/config",
"additional_framework_parameters": {},
"job_name": "sagemaker-pytorch-2020-02-23-10-29-09-269",
"input_data_config": {
"training": {
"TrainingInputMode": "File",
"S3DistributionType": "FullyReplicated",
"RecordWrapperType": "None"
}
},
"module_name": "train",
"hosts": [
"algo-1"
],
"input_dir": "/opt/ml/input"[0m
[34m}
[0m
[34mEnvironment variables:
[0m
[34mSM_NUM_CPUS=4[0m
[34mSM_HP_EPOCHS=10[0m
[34mSM_TRAINING_ENV={"additional_framework_parameters":{},"channel_input_dirs":{"training":"/opt/ml/input/data/training"},"current_host":"algo-1","framework_module":"sagemaker_pytorch_container.training:main","hosts":["algo-1"],"hyperparameters":{"epochs":10,"hidden_dim":200},"input_config_dir":"/opt/ml/input/config","input_data_config":{"training":{"RecordWrapperType":"None","S3DistributionType":"FullyReplicated","TrainingInputMode":"File"}},"input_dir":"/opt/ml/input","job_name":"sagemaker-pytorch-2020-02-23-10-29-09-269","log_level":20,"model_dir":"/opt/ml/model","module_dir":"s3://sagemaker-us-east-2-621192006701/sagemaker-pytorch-2020-02-23-10-29-09-269/source/sourcedir.tar.gz","module_name":"train","network_interface_name":"eth0","num_cpus":4,"num_gpus":1,"output_data_dir":"/opt/ml/output/data","output_dir":"/opt/ml/output","output_intermediate_dir":"/opt/ml/output/intermediate","resource_config":{"current_host":"algo-1","hosts":["algo-1"],"network_interface_name":"eth0"},"user_entry_point":"train.py"}[0m
[34mSM_MODULE_NAME=train[0m
[34mSM_MODEL_DIR=/opt/ml/model[0m
[34mSM_INPUT_DATA_CONFIG={"training":{"RecordWrapperType":"None","S3DistributionType":"FullyReplicated","TrainingInputMode":"File"}}[0m
[34mSM_NUM_GPUS=1[0m
[34mSM_NETWORK_INTERFACE_NAME=eth0[0m
[34mSM_HPS={"epochs":10,"hidden_dim":200}[0m
[34mSM_FRAMEWORK_MODULE=sagemaker_pytorch_container.training:main[0m
[34mSM_OUTPUT_DIR=/opt/ml/output[0m
[34mSM_OUTPUT_INTERMEDIATE_DIR=/opt/ml/output/intermediate[0m
[34mSM_FRAMEWORK_PARAMS={}[0m
[34mSM_MODULE_DIR=s3://sagemaker-us-east-2-621192006701/sagemaker-pytorch-2020-02-23-10-29-09-269/source/sourcedir.tar.gz[0m
[34mPYTHONPATH=/usr/local/bin:/usr/lib/python35.zip:/usr/lib/python3.5:/usr/lib/python3.5/plat-x86_64-linux-gnu:/usr/lib/python3.5/lib-dynload:/usr/local/lib/python3.5/dist-packages:/usr/lib/python3/dist-packages[0m
[34mSM_CHANNELS=["training"][0m
[34mSM_USER_ARGS=["--epochs","10","--hidden_dim","200"][0m
[34mSM_CHANNEL_TRAINING=/opt/ml/input/data/training[0m
[34mSM_INPUT_CONFIG_DIR=/opt/ml/input/config[0m
[34mSM_HOSTS=["algo-1"][0m
[34mSM_RESOURCE_CONFIG={"current_host":"algo-1","hosts":["algo-1"],"network_interface_name":"eth0"}[0m
[34mSM_USER_ENTRY_POINT=train.py[0m
[34mSM_HP_HIDDEN_DIM=200[0m
[34mSM_INPUT_DIR=/opt/ml/input[0m
[34mSM_CURRENT_HOST=algo-1[0m
[34mSM_OUTPUT_DATA_DIR=/opt/ml/output/data[0m
[34mSM_LOG_LEVEL=20
[0m
[34mInvoking script with the following command:
[0m
[34m/usr/bin/python -m train --epochs 10 --hidden_dim 200
[0m
[34mUsing device cuda.[0m
[34mGet train data loader.[0m
[34mModel loaded with embedding_dim 32, hidden_dim 200, vocab_size 5000.[0m
[34mEpoch: 1, BCELoss: 0.6749516141657926[0m
[34mEpoch: 2, BCELoss: 0.5924099878389009[0m
[34mEpoch: 3, BCELoss: 0.50403351017407[0m
[34mEpoch: 4, BCELoss: 0.4240985257284982[0m
[34mEpoch: 5, BCELoss: 0.38010544862066[0m
[34mEpoch: 6, BCELoss: 0.3434085663484067[0m
[34mEpoch: 7, BCELoss: 0.319852275811896[0m
[34mEpoch: 8, BCELoss: 0.32171173728242214[0m
[34mEpoch: 9, BCELoss: 0.29324838214991045[0m
2020-02-23 10:35:41 Uploading - Uploading generated training model[34mEpoch: 10, BCELoss: 0.2656841928861579[0m
[34m2020-02-23 10:35:40,457 sagemaker-containers INFO Reporting training SUCCESS[0m
2020-02-23 10:35:48 Completed - Training job completed
Training seconds: 276
Billable seconds: 276Step 5: Testing the model
As mentioned at the top of this notebook, we will be testing this model by first deploying it and then sending the testing data to the deployed endpoint. We will do this so that we can make sure that the deployed model is working correctly.
Step 6: Deploy the model for testing
Now that we have trained our model, we would like to test it to see how it performs. Currently our model takes input of the form review_length, review[500] where review[500] is a sequence of 500 integers which describe the words present in the review, encoded using word_dict. Fortunately for us, SageMaker provides built-in inference code for models with simple inputs such as this.
There is one thing that we need to provide, however, and that is a function which loads the saved model. This function must be called model_fn() and takes as its only parameter a path to the directory where the model artifacts are stored. This function must also be present in the python file which we specified as the entry point. In our case the model loading function has been provided and so no changes need to be made.
NOTE: When the built-in inference code is run it must import the model_fn() method from the train.py file. This is why the training code is wrapped in a main guard ( ie, if __name__ == '__main__': )
Since we don’t need to change anything in the code that was uploaded during training, we can simply deploy the current model as-is.
NOTE: When deploying a model you are asking SageMaker to launch an compute instance that will wait for data to be sent to it. As a result, this compute instance will continue to run until you shut it down. This is important to know since the cost of a deployed endpoint depends on how long it has been running for.
In other words If you are no longer using a deployed endpoint, shut it down!
TODO: Deploy the trained model.
1 | # TODO: Deploy the trained model |
-----------!Step 7 - Use the model for testing
Once deployed, we can read in the test data and send it off to our deployed model to get some results. Once we collect all of the results we can determine how accurate our model is.
1 | test_X = pd.concat([pd.DataFrame(test_X_len), pd.DataFrame(test_X)], axis=1) |
1 | # We split the data into chunks and send each chunk seperately, accumulating the results. |
1 | predictions = predict(test_X.values) |
1 | from sklearn.metrics import accuracy_score |
0.8506Question: How does this model compare to the XGBoost model you created earlier? Why might these two models perform differently on this dataset? Which do you think is better for sentiment analysis?
Answer: The result from the RNN model is quite similar to the XGBoost model. Therefore, both models are preferred in sentiment analysis.
(TODO) More testing
We now have a trained model which has been deployed and which we can send processed reviews to and which returns the predicted sentiment. However, ultimately we would like to be able to send our model an unprocessed review. That is, we would like to send the review itself as a string. For example, suppose we wish to send the following review to our model.
1 | test_review = 'The simplest pleasures in life are the best, and this film is one of them. Combining a rather basic storyline of love and adventure this movie transcends the usual weekend fair with wit and unmitigated charm.' |
The question we now need to answer is, how do we send this review to our model?
Recall in the first section of this notebook we did a bunch of data processing to the IMDb dataset. In particular, we did two specific things to the provided reviews.
- Removed any html tags and stemmed the input
- Encoded the review as a sequence of integers using
word_dict
In order process the review we will need to repeat these two steps.
TODO: Using the review_to_words and convert_and_pad methods from section one, convert test_review into a numpy array test_data suitable to send to our model. Remember that our model expects input of the form review_length, review[500].
1 | # TODO: Convert test_review into a form usable by the model and save the results in test_data |
Now that we have processed the review, we can send the resulting array to our model to predict the sentiment of the review.
1 | predictor.predict(test_data) |
array(0.6213178, dtype=float32)Since the return value of our model is close to 1, we can be certain that the review we submitted is positive.
Delete the endpoint
Of course, just like in the XGBoost notebook, once we’ve deployed an endpoint it continues to run until we tell it to shut down. Since we are done using our endpoint for now, we can delete it.
1 | estimator.delete_endpoint() |
Step 6 (again) - Deploy the model for the web app
Now that we know that our model is working, it’s time to create some custom inference code so that we can send the model a review which has not been processed and have it determine the sentiment of the review.
As we saw above, by default the estimator which we created, when deployed, will use the entry script and directory which we provided when creating the model. However, since we now wish to accept a string as input and our model expects a processed review, we need to write some custom inference code.
We will store the code that we write in the serve directory. Provided in this directory is the model.py file that we used to construct our model, a utils.py file which contains the review_to_words and convert_and_pad pre-processing functions which we used during the initial data processing, and predict.py, the file which will contain our custom inference code. Note also that requirements.txt is present which will tell SageMaker what Python libraries are required by our custom inference code.
When deploying a PyTorch model in SageMaker, you are expected to provide four functions which the SageMaker inference container will use.
model_fn: This function is the same function that we used in the training script and it tells SageMaker how to load our model.input_fn: This function receives the raw serialized input that has been sent to the model’s endpoint and its job is to de-serialize and make the input available for the inference code.output_fn: This function takes the output of the inference code and its job is to serialize this output and return it to the caller of the model’s endpoint.predict_fn: The heart of the inference script, this is where the actual prediction is done and is the function which you will need to complete.
For the simple website that we are constructing during this project, the input_fn and output_fn methods are relatively straightforward. We only require being able to accept a string as input and we expect to return a single value as output. You might imagine though that in a more complex application the input or output may be image data or some other binary data which would require some effort to serialize.
(TODO) Writing inference code
Before writing our custom inference code, we will begin by taking a look at the code which has been provided.
1 | !pygmentize serve/predict.py |
[34mimport[39;49;00m [04m[36margparse[39;49;00m
[34mimport[39;49;00m [04m[36mjson[39;49;00m
[34mimport[39;49;00m [04m[36mos[39;49;00m
[34mimport[39;49;00m [04m[36mpickle[39;49;00m
[34mimport[39;49;00m [04m[36msys[39;49;00m
[34mimport[39;49;00m [04m[36msagemaker_containers[39;49;00m
[34mimport[39;49;00m [04m[36mpandas[39;49;00m [34mas[39;49;00m [04m[36mpd[39;49;00m
[34mimport[39;49;00m [04m[36mnumpy[39;49;00m [34mas[39;49;00m [04m[36mnp[39;49;00m
[34mimport[39;49;00m [04m[36mtorch[39;49;00m
[34mimport[39;49;00m [04m[36mtorch.nn[39;49;00m [34mas[39;49;00m [04m[36mnn[39;49;00m
[34mimport[39;49;00m [04m[36mtorch.optim[39;49;00m [34mas[39;49;00m [04m[36moptim[39;49;00m
[34mimport[39;49;00m [04m[36mtorch.utils.data[39;49;00m
[34mfrom[39;49;00m [04m[36mmodel[39;49;00m [34mimport[39;49;00m LSTMClassifier
[34mfrom[39;49;00m [04m[36mutils[39;49;00m [34mimport[39;49;00m review_to_words, convert_and_pad
[34mdef[39;49;00m [32mmodel_fn[39;49;00m(model_dir):
[33m"""Load the PyTorch model from the `model_dir` directory."""[39;49;00m
[34mprint[39;49;00m([33m"[39;49;00m[33mLoading model.[39;49;00m[33m"[39;49;00m)
[37m# First, load the parameters used to create the model.[39;49;00m
model_info = {}
model_info_path = os.path.join(model_dir, [33m'[39;49;00m[33mmodel_info.pth[39;49;00m[33m'[39;49;00m)
[34mwith[39;49;00m [36mopen[39;49;00m(model_info_path, [33m'[39;49;00m[33mrb[39;49;00m[33m'[39;49;00m) [34mas[39;49;00m f:
model_info = torch.load(f)
[34mprint[39;49;00m([33m"[39;49;00m[33mmodel_info: {}[39;49;00m[33m"[39;49;00m.format(model_info))
[37m# Determine the device and construct the model.[39;49;00m
device = torch.device([33m"[39;49;00m[33mcuda[39;49;00m[33m"[39;49;00m [34mif[39;49;00m torch.cuda.is_available() [34melse[39;49;00m [33m"[39;49;00m[33mcpu[39;49;00m[33m"[39;49;00m)
model = LSTMClassifier(model_info[[33m'[39;49;00m[33membedding_dim[39;49;00m[33m'[39;49;00m], model_info[[33m'[39;49;00m[33mhidden_dim[39;49;00m[33m'[39;49;00m], model_info[[33m'[39;49;00m[33mvocab_size[39;49;00m[33m'[39;49;00m])
[37m# Load the store model parameters.[39;49;00m
model_path = os.path.join(model_dir, [33m'[39;49;00m[33mmodel.pth[39;49;00m[33m'[39;49;00m)
[34mwith[39;49;00m [36mopen[39;49;00m(model_path, [33m'[39;49;00m[33mrb[39;49;00m[33m'[39;49;00m) [34mas[39;49;00m f:
model.load_state_dict(torch.load(f))
[37m# Load the saved word_dict.[39;49;00m
word_dict_path = os.path.join(model_dir, [33m'[39;49;00m[33mword_dict.pkl[39;49;00m[33m'[39;49;00m)
[34mwith[39;49;00m [36mopen[39;49;00m(word_dict_path, [33m'[39;49;00m[33mrb[39;49;00m[33m'[39;49;00m) [34mas[39;49;00m f:
model.word_dict = pickle.load(f)
model.to(device).eval()
[34mprint[39;49;00m([33m"[39;49;00m[33mDone loading model.[39;49;00m[33m"[39;49;00m)
[34mreturn[39;49;00m model
[34mdef[39;49;00m [32minput_fn[39;49;00m(serialized_input_data, content_type):
[34mprint[39;49;00m([33m'[39;49;00m[33mDeserializing the input data.[39;49;00m[33m'[39;49;00m)
[34mif[39;49;00m content_type == [33m'[39;49;00m[33mtext/plain[39;49;00m[33m'[39;49;00m:
data = serialized_input_data.decode([33m'[39;49;00m[33mutf-8[39;49;00m[33m'[39;49;00m)
[34mreturn[39;49;00m data
[34mraise[39;49;00m [36mException[39;49;00m([33m'[39;49;00m[33mRequested unsupported ContentType in content_type: [39;49;00m[33m'[39;49;00m + content_type)
[34mdef[39;49;00m [32moutput_fn[39;49;00m(prediction_output, accept):
[34mprint[39;49;00m([33m'[39;49;00m[33mSerializing the generated output.[39;49;00m[33m'[39;49;00m)
[34mreturn[39;49;00m [36mstr[39;49;00m(prediction_output)
[34mdef[39;49;00m [32mpredict_fn[39;49;00m(input_data, model):
[34mprint[39;49;00m([33m'[39;49;00m[33mInferring sentiment of input data.[39;49;00m[33m'[39;49;00m)
device = torch.device([33m"[39;49;00m[33mcuda[39;49;00m[33m"[39;49;00m [34mif[39;49;00m torch.cuda.is_available() [34melse[39;49;00m [33m"[39;49;00m[33mcpu[39;49;00m[33m"[39;49;00m)
[34mif[39;49;00m model.word_dict [35mis[39;49;00m [36mNone[39;49;00m:
[34mraise[39;49;00m [36mException[39;49;00m([33m'[39;49;00m[33mModel has not been loaded properly, no word_dict.[39;49;00m[33m'[39;49;00m)
[37m# TODO: Process input_data so that it is ready to be sent to our model.[39;49;00m
[37m# You should produce two variables:[39;49;00m
[37m# data_X - A sequence of length 500 which represents the converted review[39;49;00m
[37m# data_len - The length of the review[39;49;00m
data_X = [36mNone[39;49;00m
data_len = [36mNone[39;49;00m
[37m# Using data_X and data_len we construct an appropriate input tensor. Remember[39;49;00m
[37m# that our model expects input data of the form 'len, review[500]'.[39;49;00m
data_pack = np.hstack((data_len, data_X))
data_pack = data_pack.reshape([34m1[39;49;00m, -[34m1[39;49;00m)
data = torch.from_numpy(data_pack)
data = data.to(device)
[37m# Make sure to put the model into evaluation mode[39;49;00m
model.eval()
[37m# TODO: Compute the result of applying the model to the input data. The variable `result` should[39;49;00m
[37m# be a numpy array which contains a single integer which is either 1 or 0[39;49;00m
result = [36mNone[39;49;00m
[34mreturn[39;49;00m resultAs mentioned earlier, the model_fn method is the same as the one provided in the training code and the input_fn and output_fn methods are very simple and your task will be to complete the predict_fn method. Make sure that you save the completed file as predict.py in the serve directory.
TODO: Complete the predict_fn() method in the serve/predict.py file.
Deploying the model
Now that the custom inference code has been written, we will create and deploy our model. To begin with, we need to construct a new PyTorchModel object which points to the model artifacts created during training and also points to the inference code that we wish to use. Then we can call the deploy method to launch the deployment container.
NOTE: The default behaviour for a deployed PyTorch model is to assume that any input passed to the predictor is a numpy array. In our case we want to send a string so we need to construct a simple wrapper around the RealTimePredictor class to accomodate simple strings. In a more complicated situation you may want to provide a serialization object, for example if you wanted to sent image data.
1 | from sagemaker.predictor import RealTimePredictor |
-----------!Testing the model
Now that we have deployed our model with the custom inference code, we should test to see if everything is working. Here we test our model by loading the first 250 positive and negative reviews and send them to the endpoint, then collect the results. The reason for only sending some of the data is that the amount of time it takes for our model to process the input and then perform inference is quite long and so testing the entire data set would be prohibitive.
1 | import glob |
1 | ground, results = test_reviews() |
Starting  pos  files
Starting  neg  files
1 | from sklearn.metrics import accuracy_score |
0.854As an additional test, we can try sending the test_review that we looked at earlier.
1 | predictor.predict(test_review) |
b'1.0'Now that we know our endpoint is working as expected, we can set up the web page that will interact with it. If you don’t have time to finish the project now, make sure to skip down to the end of this notebook and shut down your endpoint. You can deploy it again when you come back.
Step 7 (again): Use the model for the web app
TODO: This entire section and the next contain tasks for you to complete, mostly using the AWS console.
So far we have been accessing our model endpoint by constructing a predictor object which uses the endpoint and then just using the predictor object to perform inference. What if we wanted to create a web app which accessed our model? The way things are set up currently makes that not possible since in order to access a SageMaker endpoint the app would first have to authenticate with AWS using an IAM role which included access to SageMaker endpoints. However, there is an easier way! We just need to use some additional AWS services.

The diagram above gives an overview of how the various services will work together. On the far right is the model which we trained above and which is deployed using SageMaker. On the far left is our web app that collects a user’s movie review, sends it off and expects a positive or negative sentiment in return.
In the middle is where some of the magic happens. We will construct a Lambda function, which you can think of as a straightforward Python function that can be executed whenever a specified event occurs. We will give this function permission to send and recieve data from a SageMaker endpoint.
Lastly, the method we will use to execute the Lambda function is a new endpoint that we will create using API Gateway. This endpoint will be a url that listens for data to be sent to it. Once it gets some data it will pass that data on to the Lambda function and then return whatever the Lambda function returns. Essentially it will act as an interface that lets our web app communicate with the Lambda function.
Setting up a Lambda function
The first thing we are going to do is set up a Lambda function. This Lambda function will be executed whenever our public API has data sent to it. When it is executed it will receive the data, perform any sort of processing that is required, send the data (the review) to the SageMaker endpoint we’ve created and then return the result.
Part A: Create an IAM Role for the Lambda function
Since we want the Lambda function to call a SageMaker endpoint, we need to make sure that it has permission to do so. To do this, we will construct a role that we can later give the Lambda function.
Using the AWS Console, navigate to the IAM page and click on Roles. Then, click on Create role. Make sure that the AWS service is the type of trusted entity selected and choose Lambda as the service that will use this role, then click Next: Permissions.
In the search box type sagemaker and select the check box next to the AmazonSageMakerFullAccess policy. Then, click on Next: Review.
Lastly, give this role a name. Make sure you use a name that you will remember later on, for example LambdaSageMakerRole. Then, click on Create role.
Part B: Create a Lambda function
Now it is time to actually create the Lambda function.
Using the AWS Console, navigate to the AWS Lambda page and click on Create a function. When you get to the next page, make sure that Author from scratch is selected. Now, name your Lambda function, using a name that you will remember later on, for example sentiment_analysis_func. Make sure that the Python 3.6 runtime is selected and then choose the role that you created in the previous part. Then, click on Create Function.
On the next page you will see some information about the Lambda function you’ve just created. If you scroll down you should see an editor in which you can write the code that will be executed when your Lambda function is triggered. In our example, we will use the code below.
1 | # We need to use the low-level library to interact with SageMaker since the SageMaker API |
Once you have copy and pasted the code above into the Lambda code editor, replace the **ENDPOINT NAME HERE** portion with the name of the endpoint that we deployed earlier. You can determine the name of the endpoint using the code cell below.
1 | predictor.endpoint |
'sagemaker-pytorch-2020-02-23-11-11-09-175'Once you have added the endpoint name to the Lambda function, click on Save. Your Lambda function is now up and running. Next we need to create a way for our web app to execute the Lambda function.
Setting up API Gateway
Now that our Lambda function is set up, it is time to create a new API using API Gateway that will trigger the Lambda function we have just created.
Using AWS Console, navigate to Amazon API Gateway and then click on Get started.
On the next page, make sure that New API is selected and give the new api a name, for example, sentiment_analysis_api. Then, click on Create API.
Now we have created an API, however it doesn’t currently do anything. What we want it to do is to trigger the Lambda function that we created earlier.
Select the Actions dropdown menu and click Create Method. A new blank method will be created, select its dropdown menu and select POST, then click on the check mark beside it.
For the integration point, make sure that Lambda Function is selected and click on the Use Lambda Proxy integration. This option makes sure that the data that is sent to the API is then sent directly to the Lambda function with no processing. It also means that the return value must be a proper response object as it will also not be processed by API Gateway.
Type the name of the Lambda function you created earlier into the Lambda Function text entry box and then click on Save. Click on OK in the pop-up box that then appears, giving permission to API Gateway to invoke the Lambda function you created.
The last step in creating the API Gateway is to select the Actions dropdown and click on Deploy API. You will need to create a new Deployment stage and name it anything you like, for example prod.
You have now successfully set up a public API to access your SageMaker model. Make sure to copy or write down the URL provided to invoke your newly created public API as this will be needed in the next step. This URL can be found at the top of the page, highlighted in blue next to the text Invoke URL.
Step 8: Deploying our web app
Now that we have a publicly available API, we can start using it in a web app. For our purposes, we have provided a simple static html file which can make use of the public api you created earlier.
In the website folder there should be a file called index.html. Download the file to your computer and open that file up in a text editor of your choice. There should be a line which contains **REPLACE WITH PUBLIC API URL**. Replace this string with the url that you wrote down in the last step and then save the file.
Now, if you open index.html on your local computer, your browser will behave as a local web server and you can use the provided site to interact with your SageMaker model.
If you’d like to go further, you can host this html file anywhere you’d like, for example using github or hosting a static site on Amazon’s S3. Once you have done this you can share the link with anyone you’d like and have them play with it too!
Important Note In order for the web app to communicate with the SageMaker endpoint, the endpoint has to actually be deployed and running. This means that you are paying for it. Make sure that the endpoint is running when you want to use the web app but that you shut it down when you don’t need it, otherwise you will end up with a surprisingly large AWS bill.
TODO: Make sure that you include the edited index.html file in your project submission.
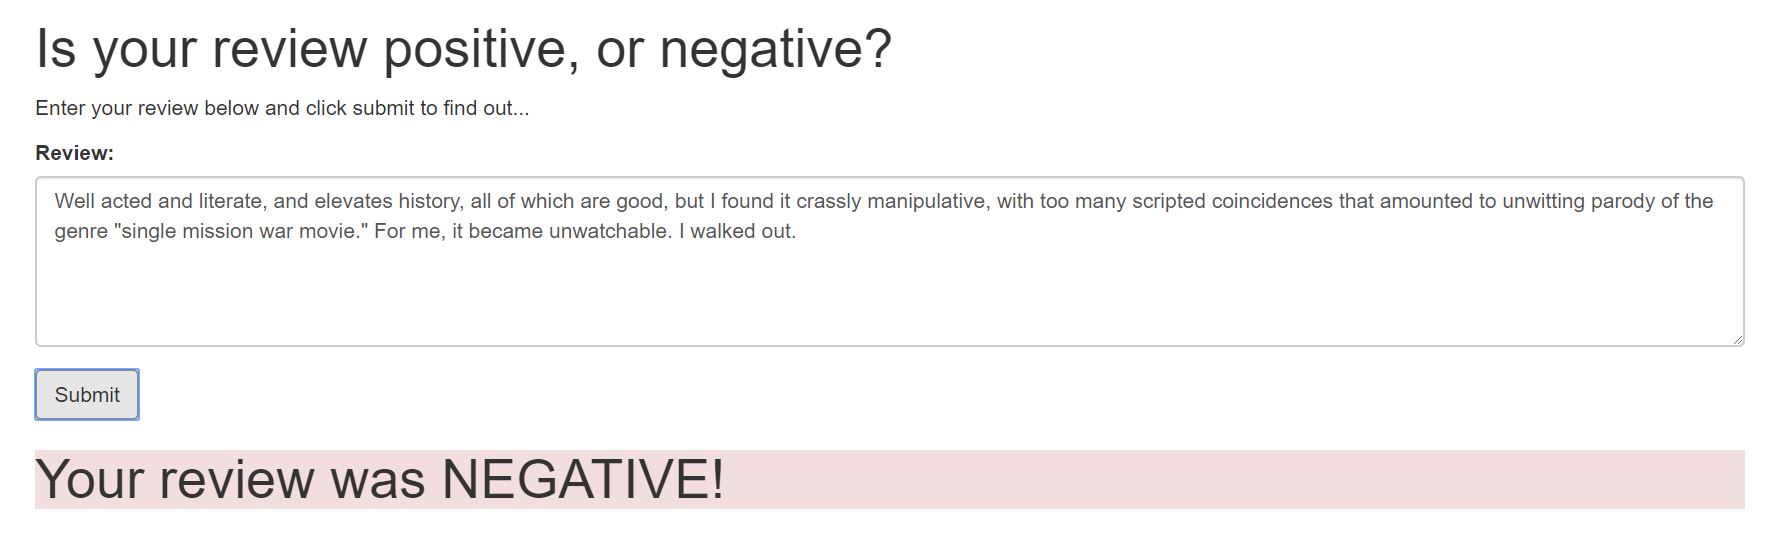
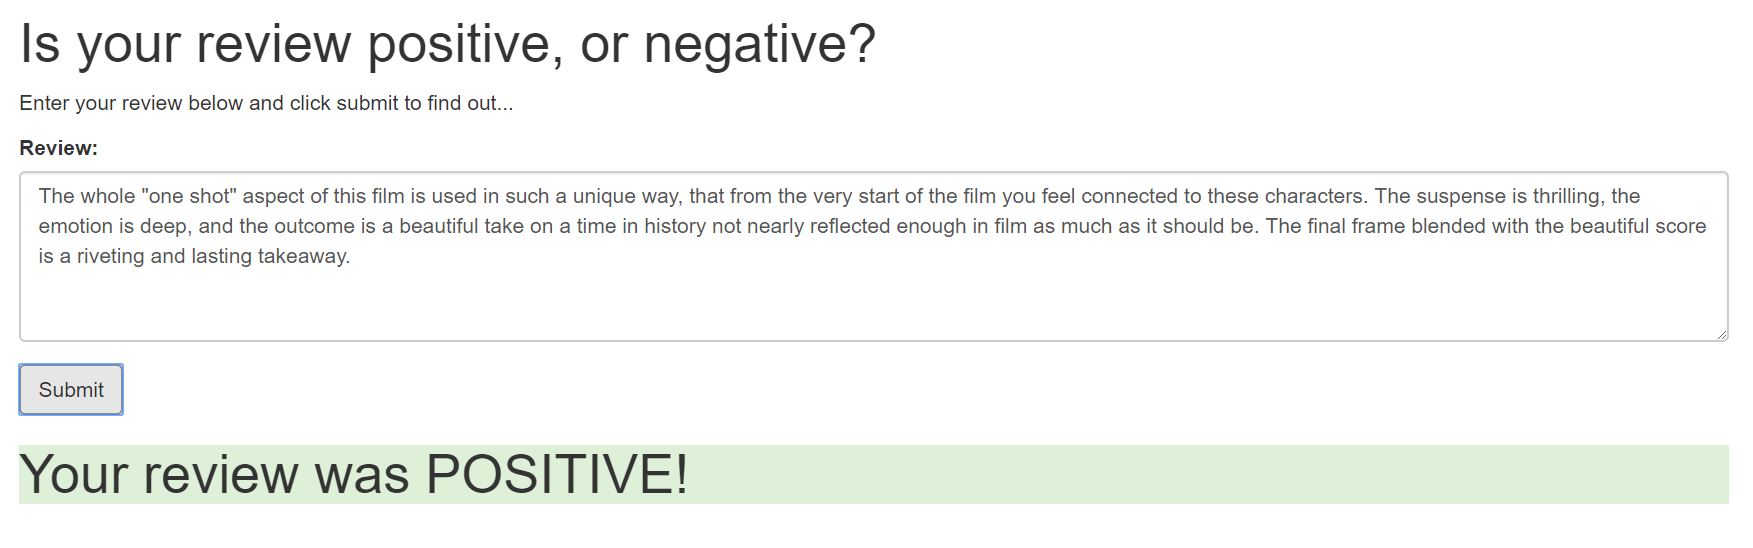
Now that your web app is working, trying playing around with it and see how well it works.
Question: Give an example of a review that you entered into your web app. What was the predicted sentiment of your example review?
Answer: I tried to use real reviews based on the movie ‘1917’, the performance is good.
Delete the endpoint
Remember to always shut down your endpoint if you are no longer using it. You are charged for the length of time that the endpoint is running so if you forget and leave it on you could end up with an unexpectedly large bill.
1 | predictor.delete_endpoint() |